
OH HI. We’re here we’re doing it. I have to preface this post by saying that I am by NO MEANS an artist (I wish) or in a creative profession. I’m just a girl in a pandemic trying to keep herself busy, who can relate? Anyway, I saw a bunch of people on TikTok turning $1 vases into really nice decorative pieces, and I got the itch to try it.
These are going to be sooooo cute on our builtins, dresser, and bookcase! I still have to put the finishing touches on a few of these but I just could not wait to share this with all of you so I went ahead and posted what I have so far. Please feel free to leave me any questions, feedback, or tips in the comments! Let’s get to it – here is how I transformed $1 vases into stunning home decor.
What You’ll Need
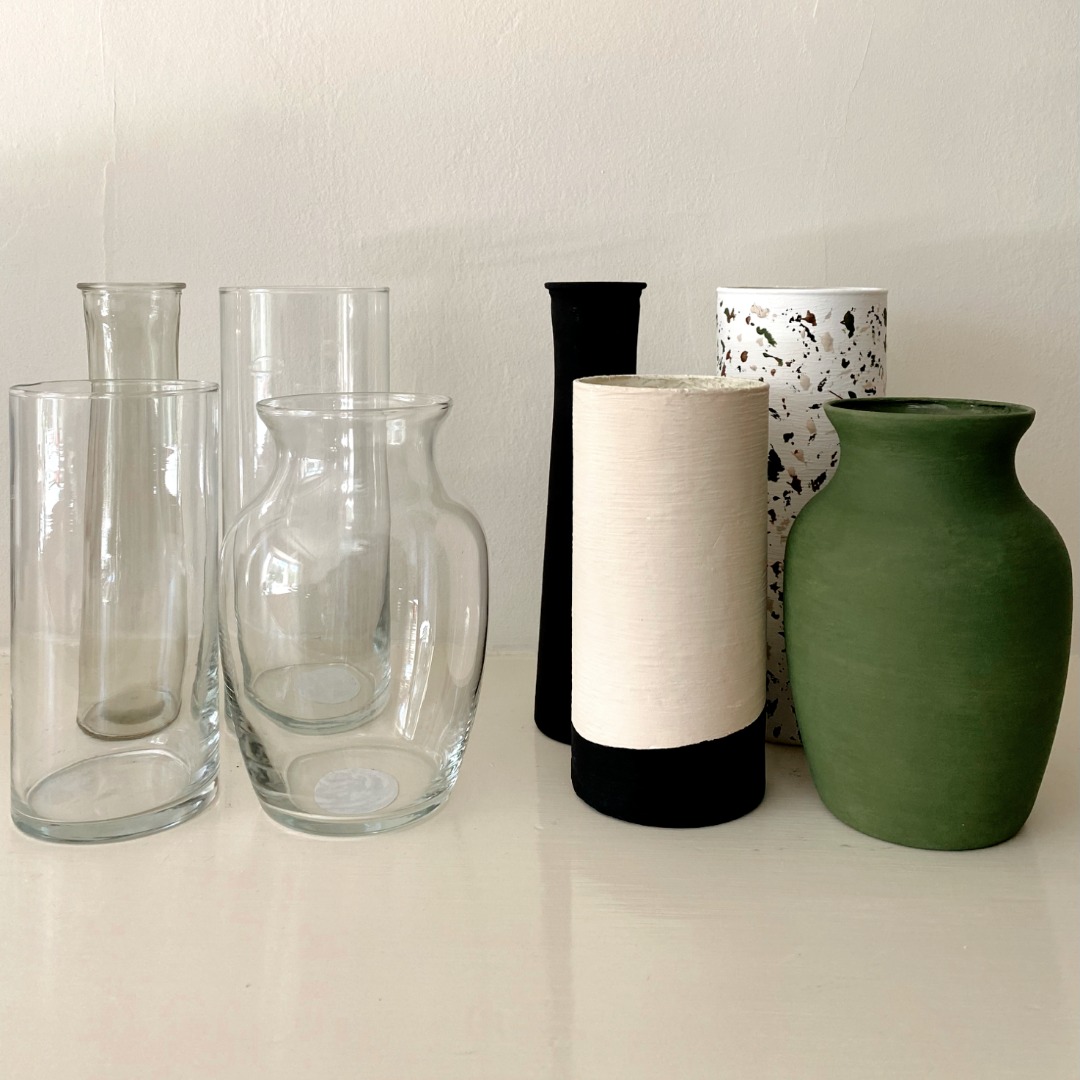
What you’ll need really depends on how many vases you want to make. I bought 20 vases (am I crazy?!) but that’s because I wanted to experiment. Keep in mind that these vases are a medium size so if you are looking for bigger ones or different shapes, you can buy vases like this or this elsewhere. It defeats the purpose of $1 vases but I digress. Also, you can use gloves but I didn’t only because the paint is water based and SUPER easy to just wash off if you get a little on yourself.
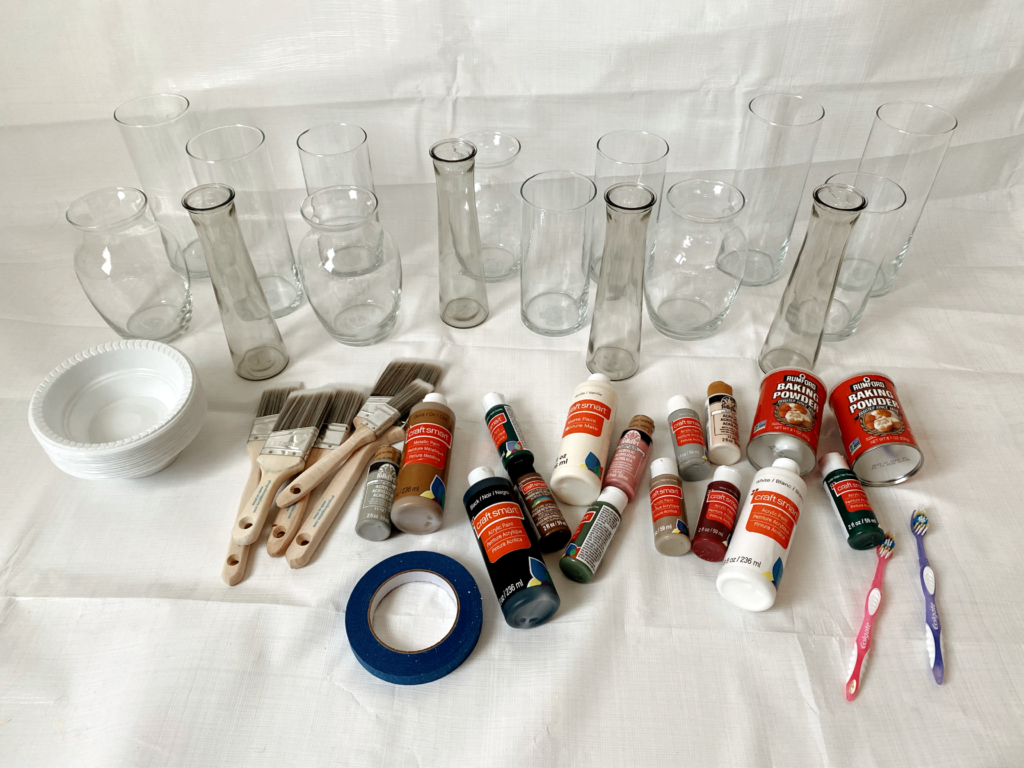
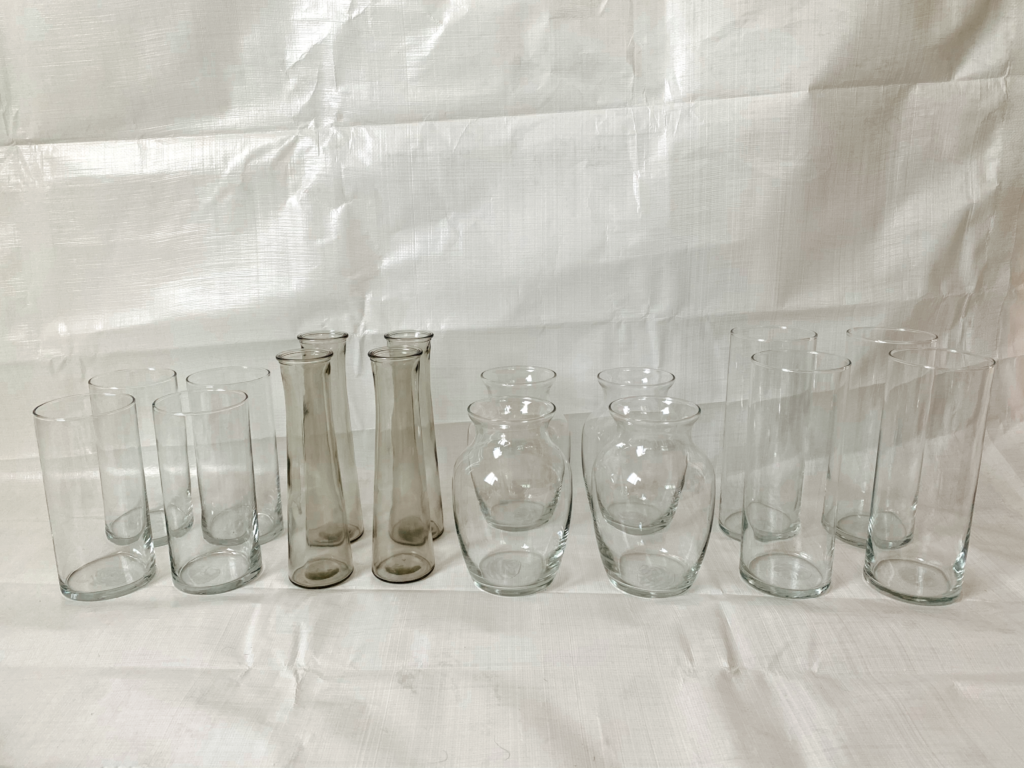
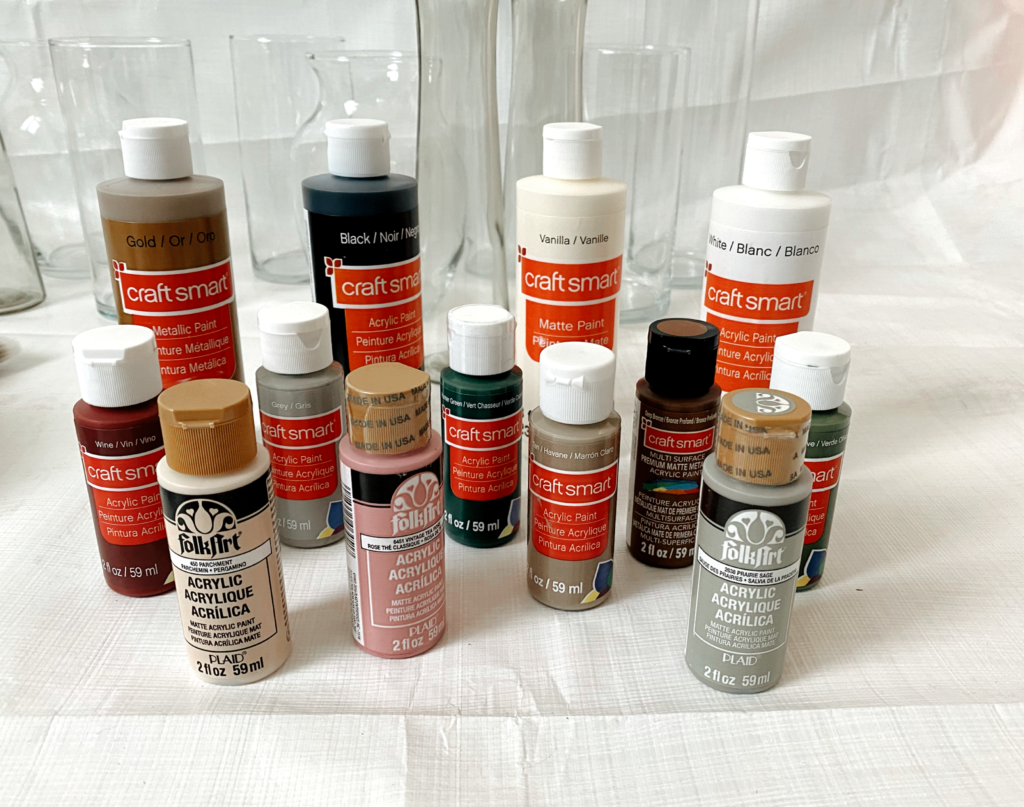
Glass $1 vases, from your local Dollar Tree or dollar store
Paint brushes, see notes
Acrylic water based paint from Michael’s, see notes
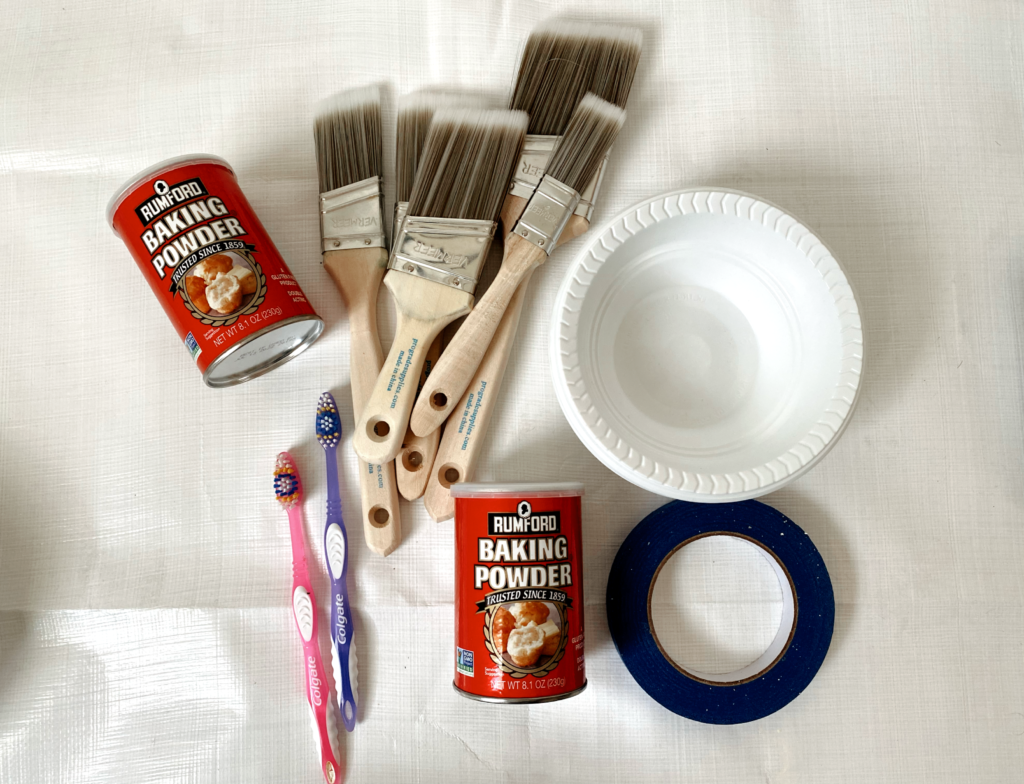
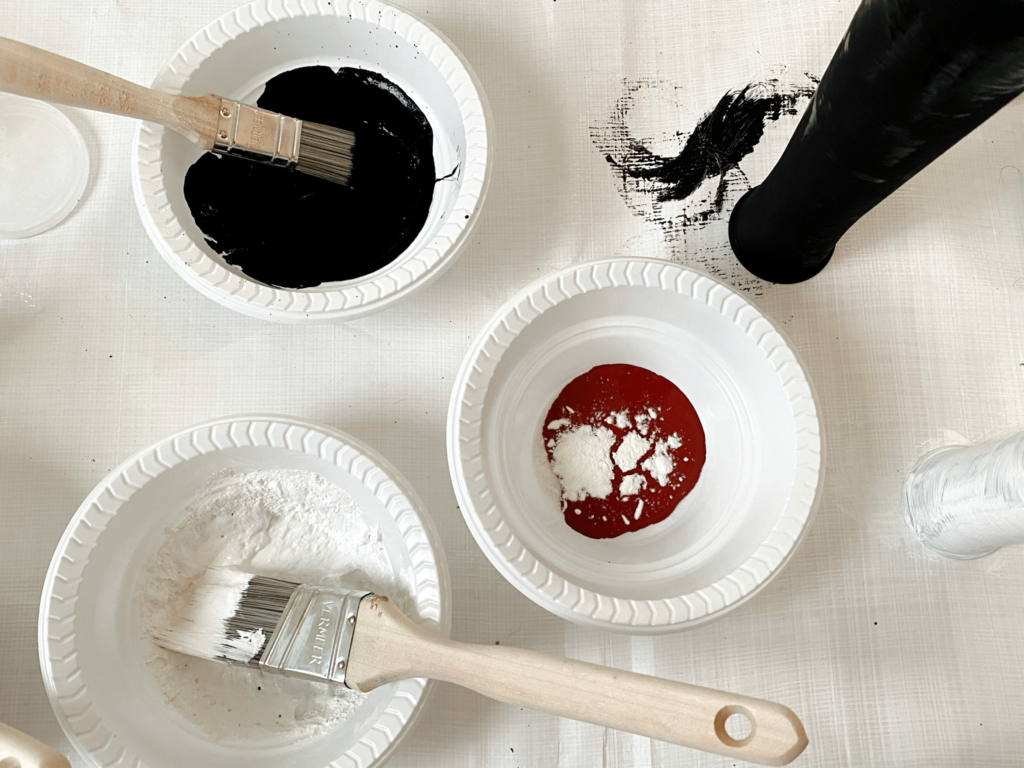
8oz baking powder (NOT SODA)
Mixing bowls
Thin paint tape, optional
Toothbrush, optional
Tarp, optional
Notes
- I got 10 paint brushes for the 20 $1 vases that I bought
- The type of paint you want to get is Acrylic, and the two brands that I got are craft smart and FolkArt
- The paint tape and toothbrush will be used if you want to add designs to your vases. If you prefer to keep the vases one solid color then you don’t need either.
- I decided to lay a tarp down and tape it to the wall just to have a “working space” and feel secure that I was not getting anything else dirty. I also used it from my splatter design (see further below). Get a white one if you plan on taking photos throughout the process – they come out better!
Links To What I Bought
Just want to preface this by saying that I’m sure you can get some of this stuff cheaper from the Dollar Tree when you pick up your vases, but we got ours shipped to our apartment, our location didn’t have a large selection, and most items required a very high minimum quantity to be able to order online, so I’m linking exactly what I got and where below.
- Glass vases – I got a 4ct of 5 different styles
- Paint brushes – I got 2 packs
- Acrylic paint – I got the 2oz in unique colors (red, pink, green, etc) and 8oz in neutral colors (white, black, vanilla) that I knew I’d be using for a lot of my bases. I wanted to pick out my own colors but you can also get a variety pack here
- Baking powder – NOT SODA
- Mixing bowls – these are great for mixing your paint in
- Paint tape
- Toothbrushes
- Tarp – In white, for photos
Instructions
1. Mix your paint
In a bowl, mix together your paint and your baking powder. It should be about 1/2tsp baking powder for every 2tbsp of paint. FYI I did not ever measure it to the exact amount, I usually eyeballed it. Just make sure that your paint becomes a little thicker but NOT completely foamy. The baking powder is what’s going to give your vase a very textured look.
2. Paint
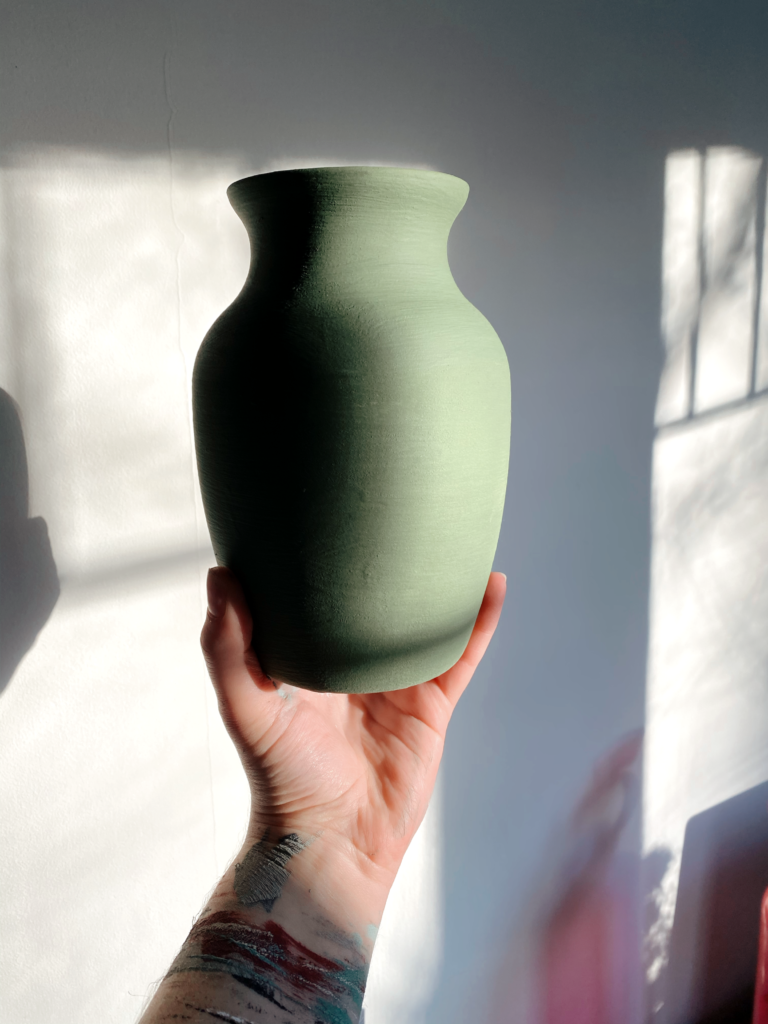
In small strokes, start from the top of the vase and work your way down, making sure that your brush strokes are always in the same direction. Your first layer should be reeeeeeeally thin, don’t worry if it’s still see through, you’ll go over that on the second and third coat. Keep in mind that if you make your first layer too thick, it will be hard to cover up on the second coat.

I ended up sticking my arm in the vases to paint and rotating it as I painted because I found it hard to paint while the vase was sitting flat on the ground or a table, if that makes sense. Holding it from inside the vase gave me more control. My arm got messy BUT WHATEVER. Here’s a picture showing all the paint lines on my arm.
3. Let it dry
Let the first coat FULLY dry. BE PATIENT. I was too eager for a few and when I tried to paint the second coat on, the first coat came right off because it was still a little wet.
4. Apply second & third coat
Apply second coat the same way you did the first. If it’s still too thin, let dry and add a third layer of paint.
5. Let it dry
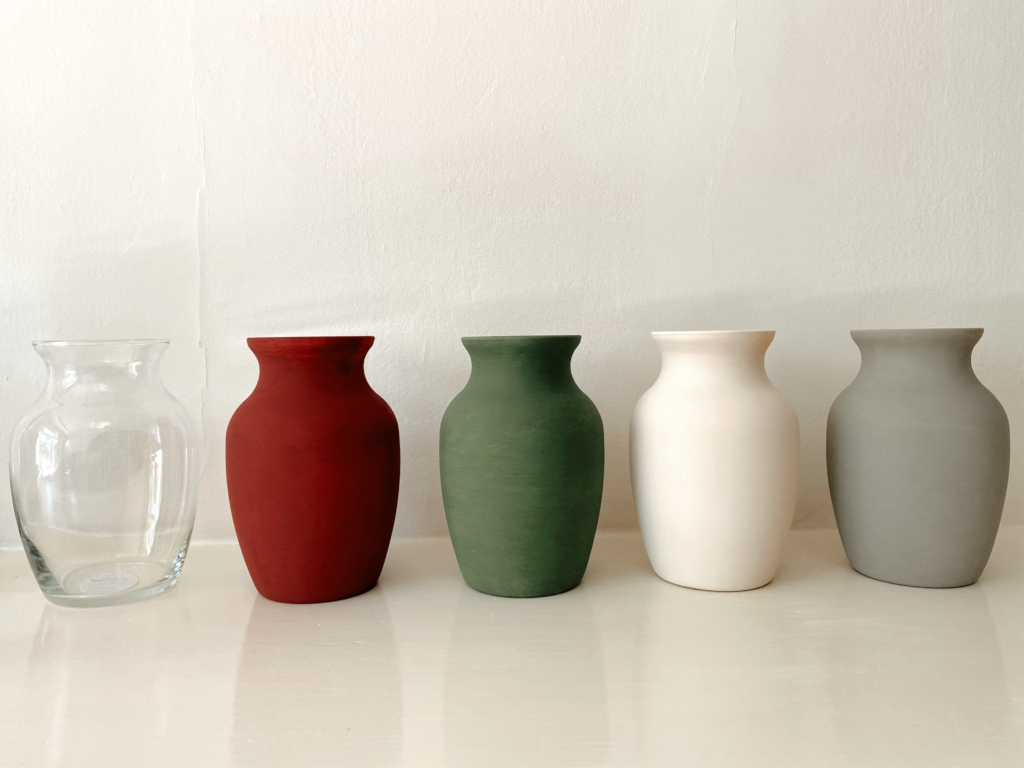
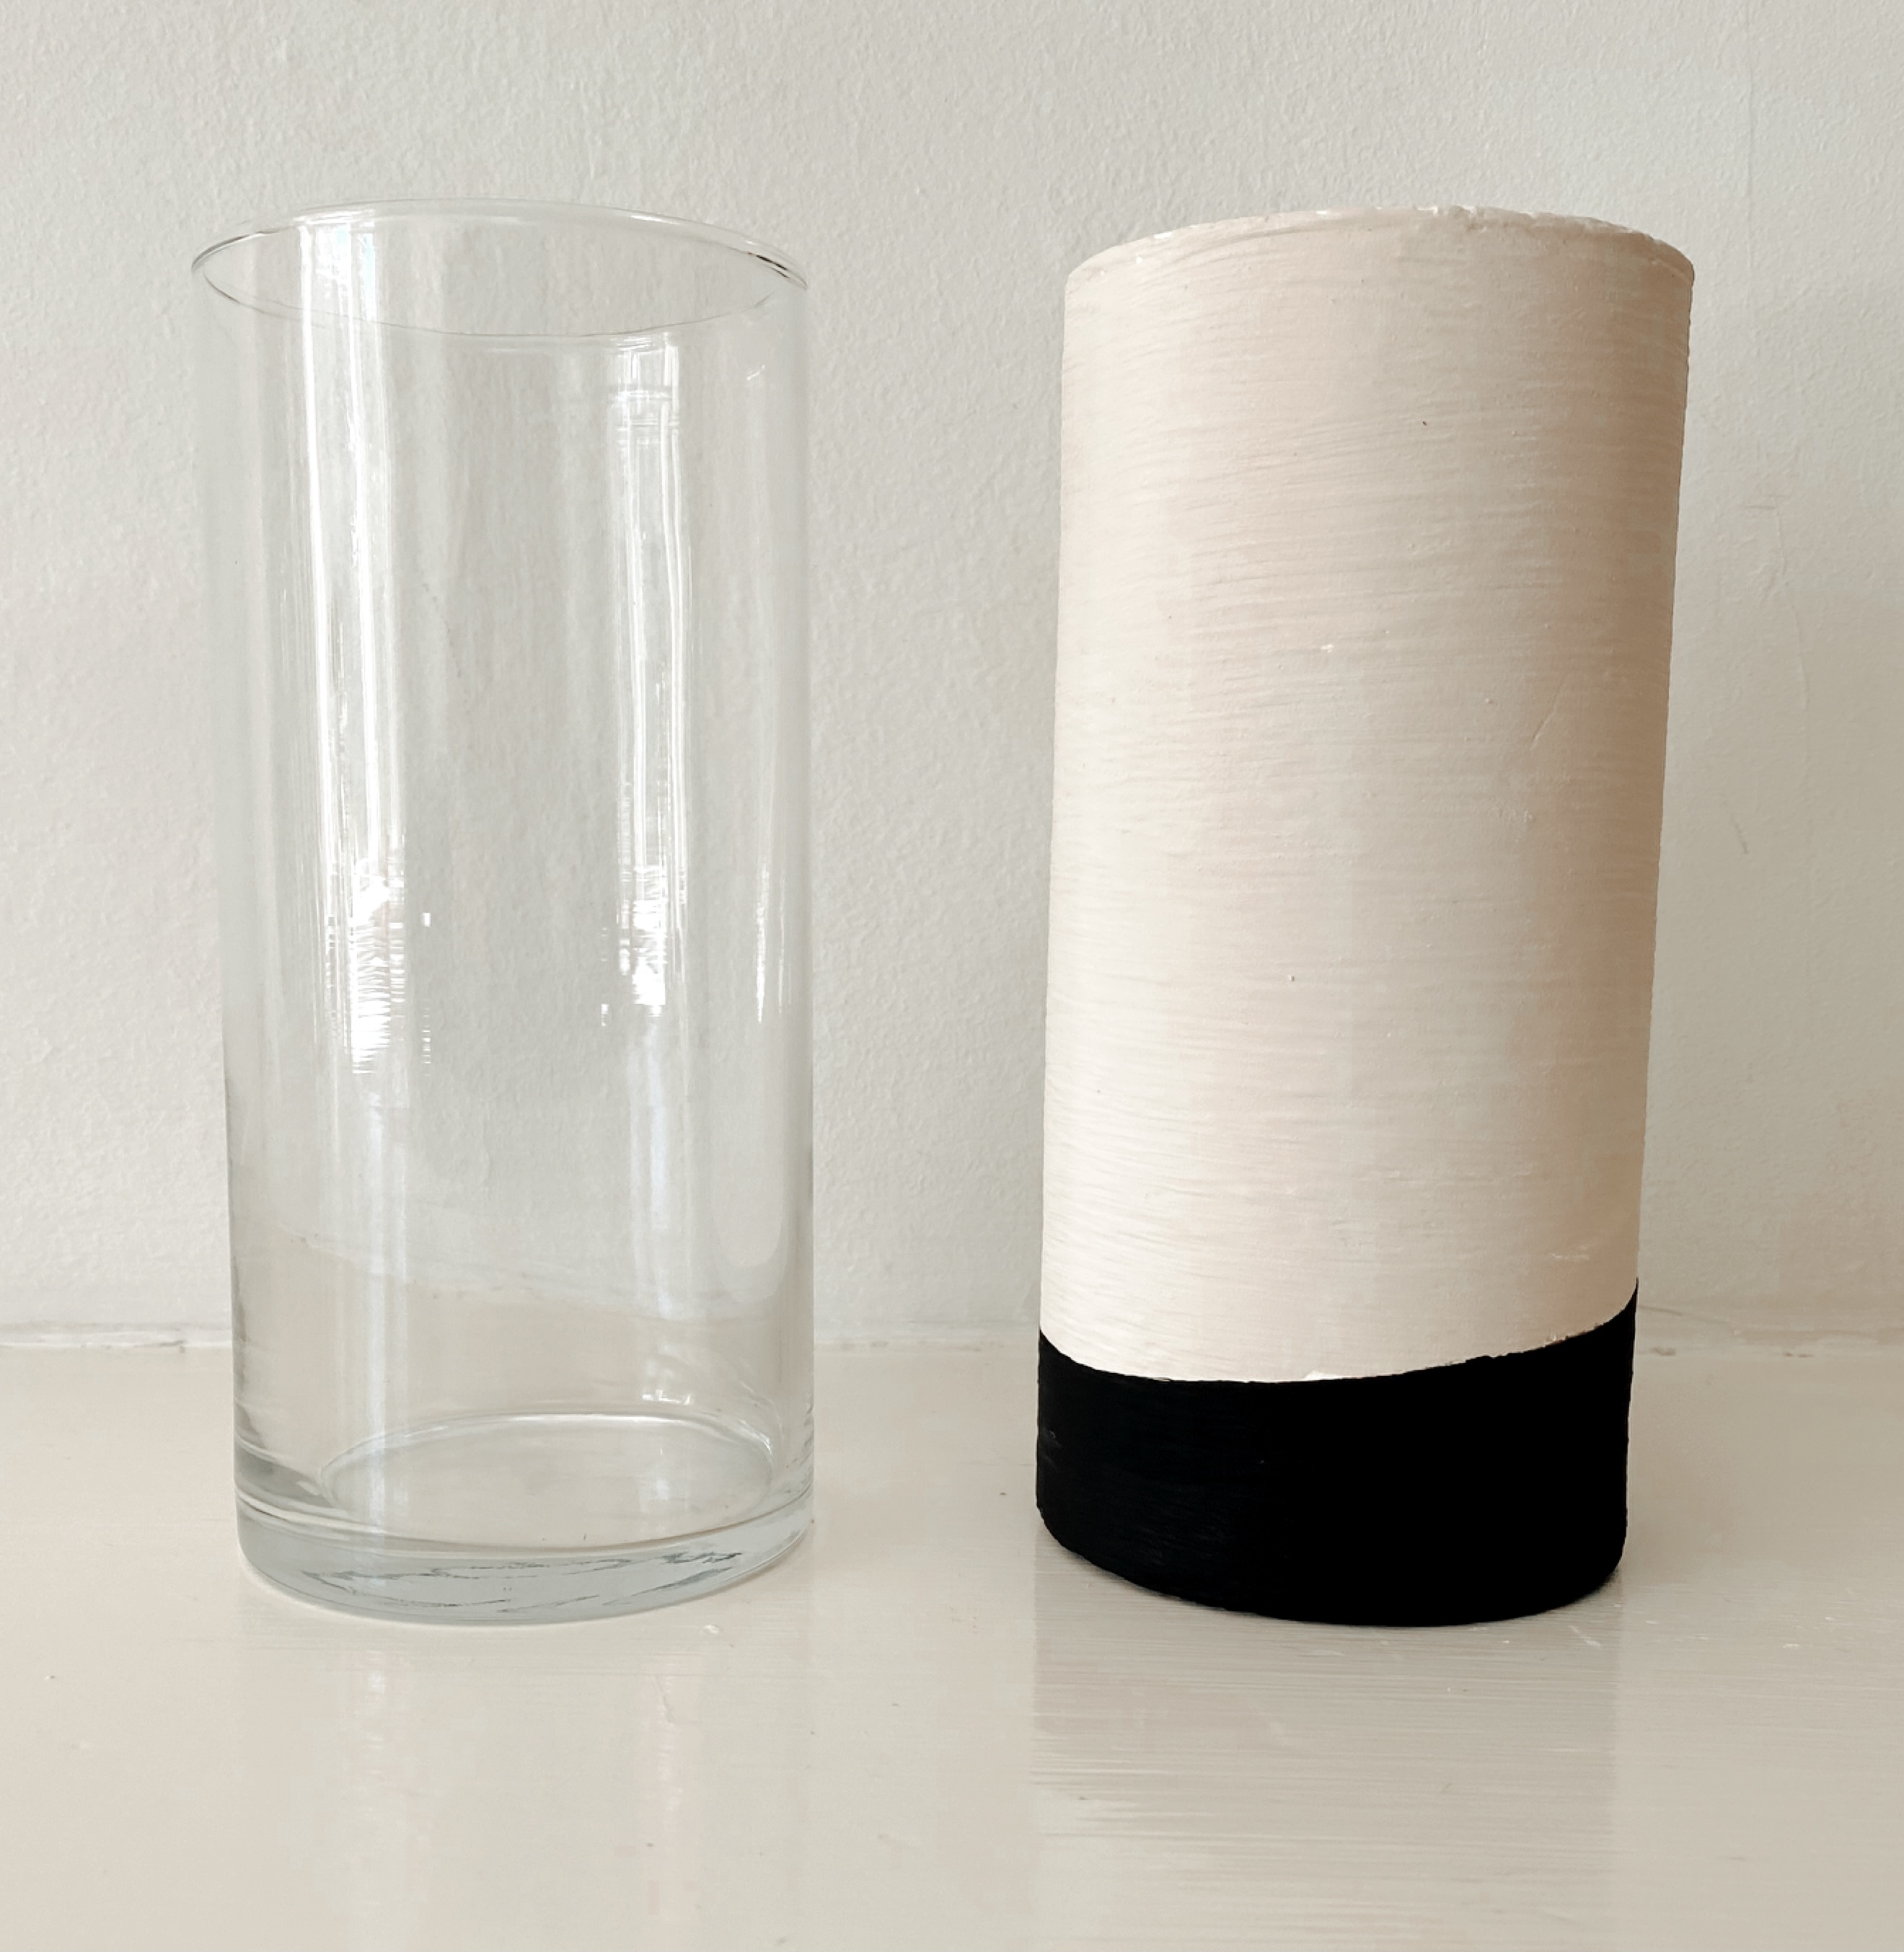
If you want your vase just one solid color, you’re done! Just let it fully dry and that’s it!
Optional Design
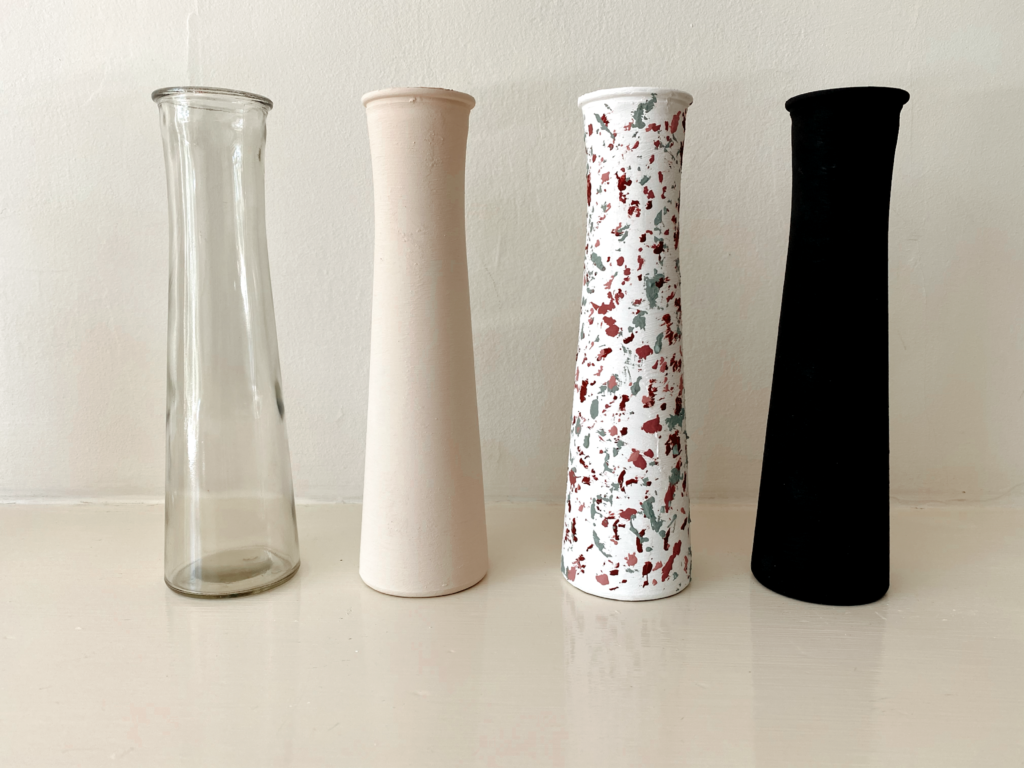
Who’s still with me? SO…when it came to putting designs on the vases, I searched on the internet for inspiration from West Elm, Target, Crate & Barrel, etc. to see which designs I liked and which patterns drew my eye. This is completely up to you and what you like. That’s why we’re using $1 vases – it’s ok if you mess up! Live your life! Just make sure that the vases are completely dry before you add any design. Here are the three designs I ended up going with.
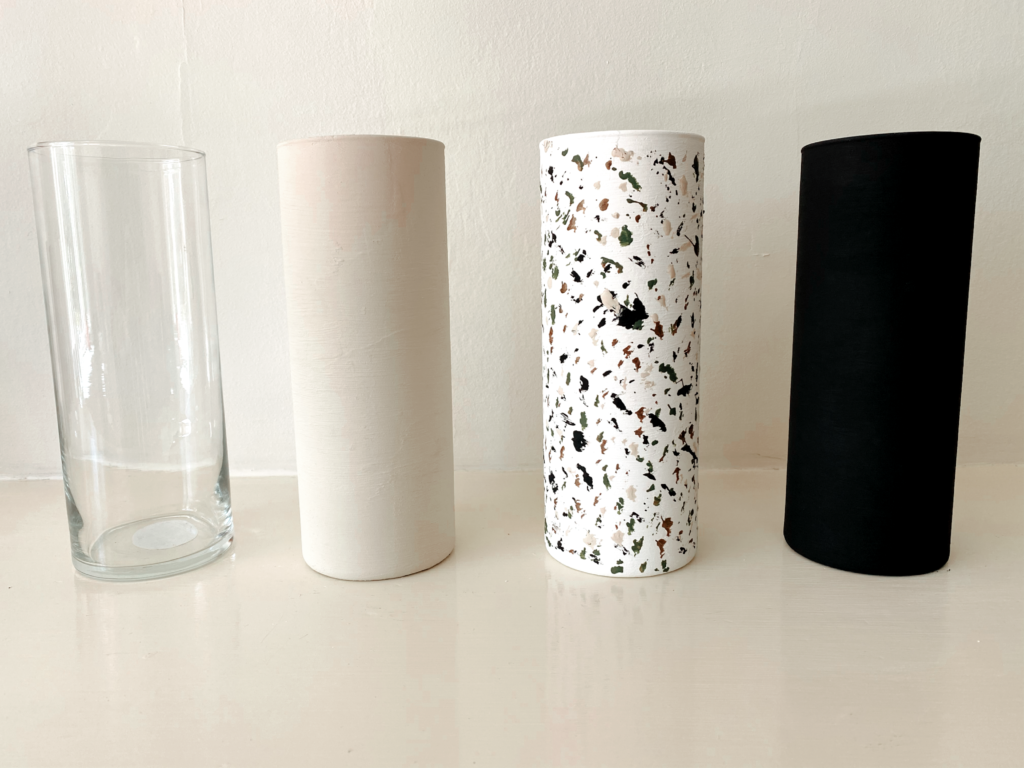
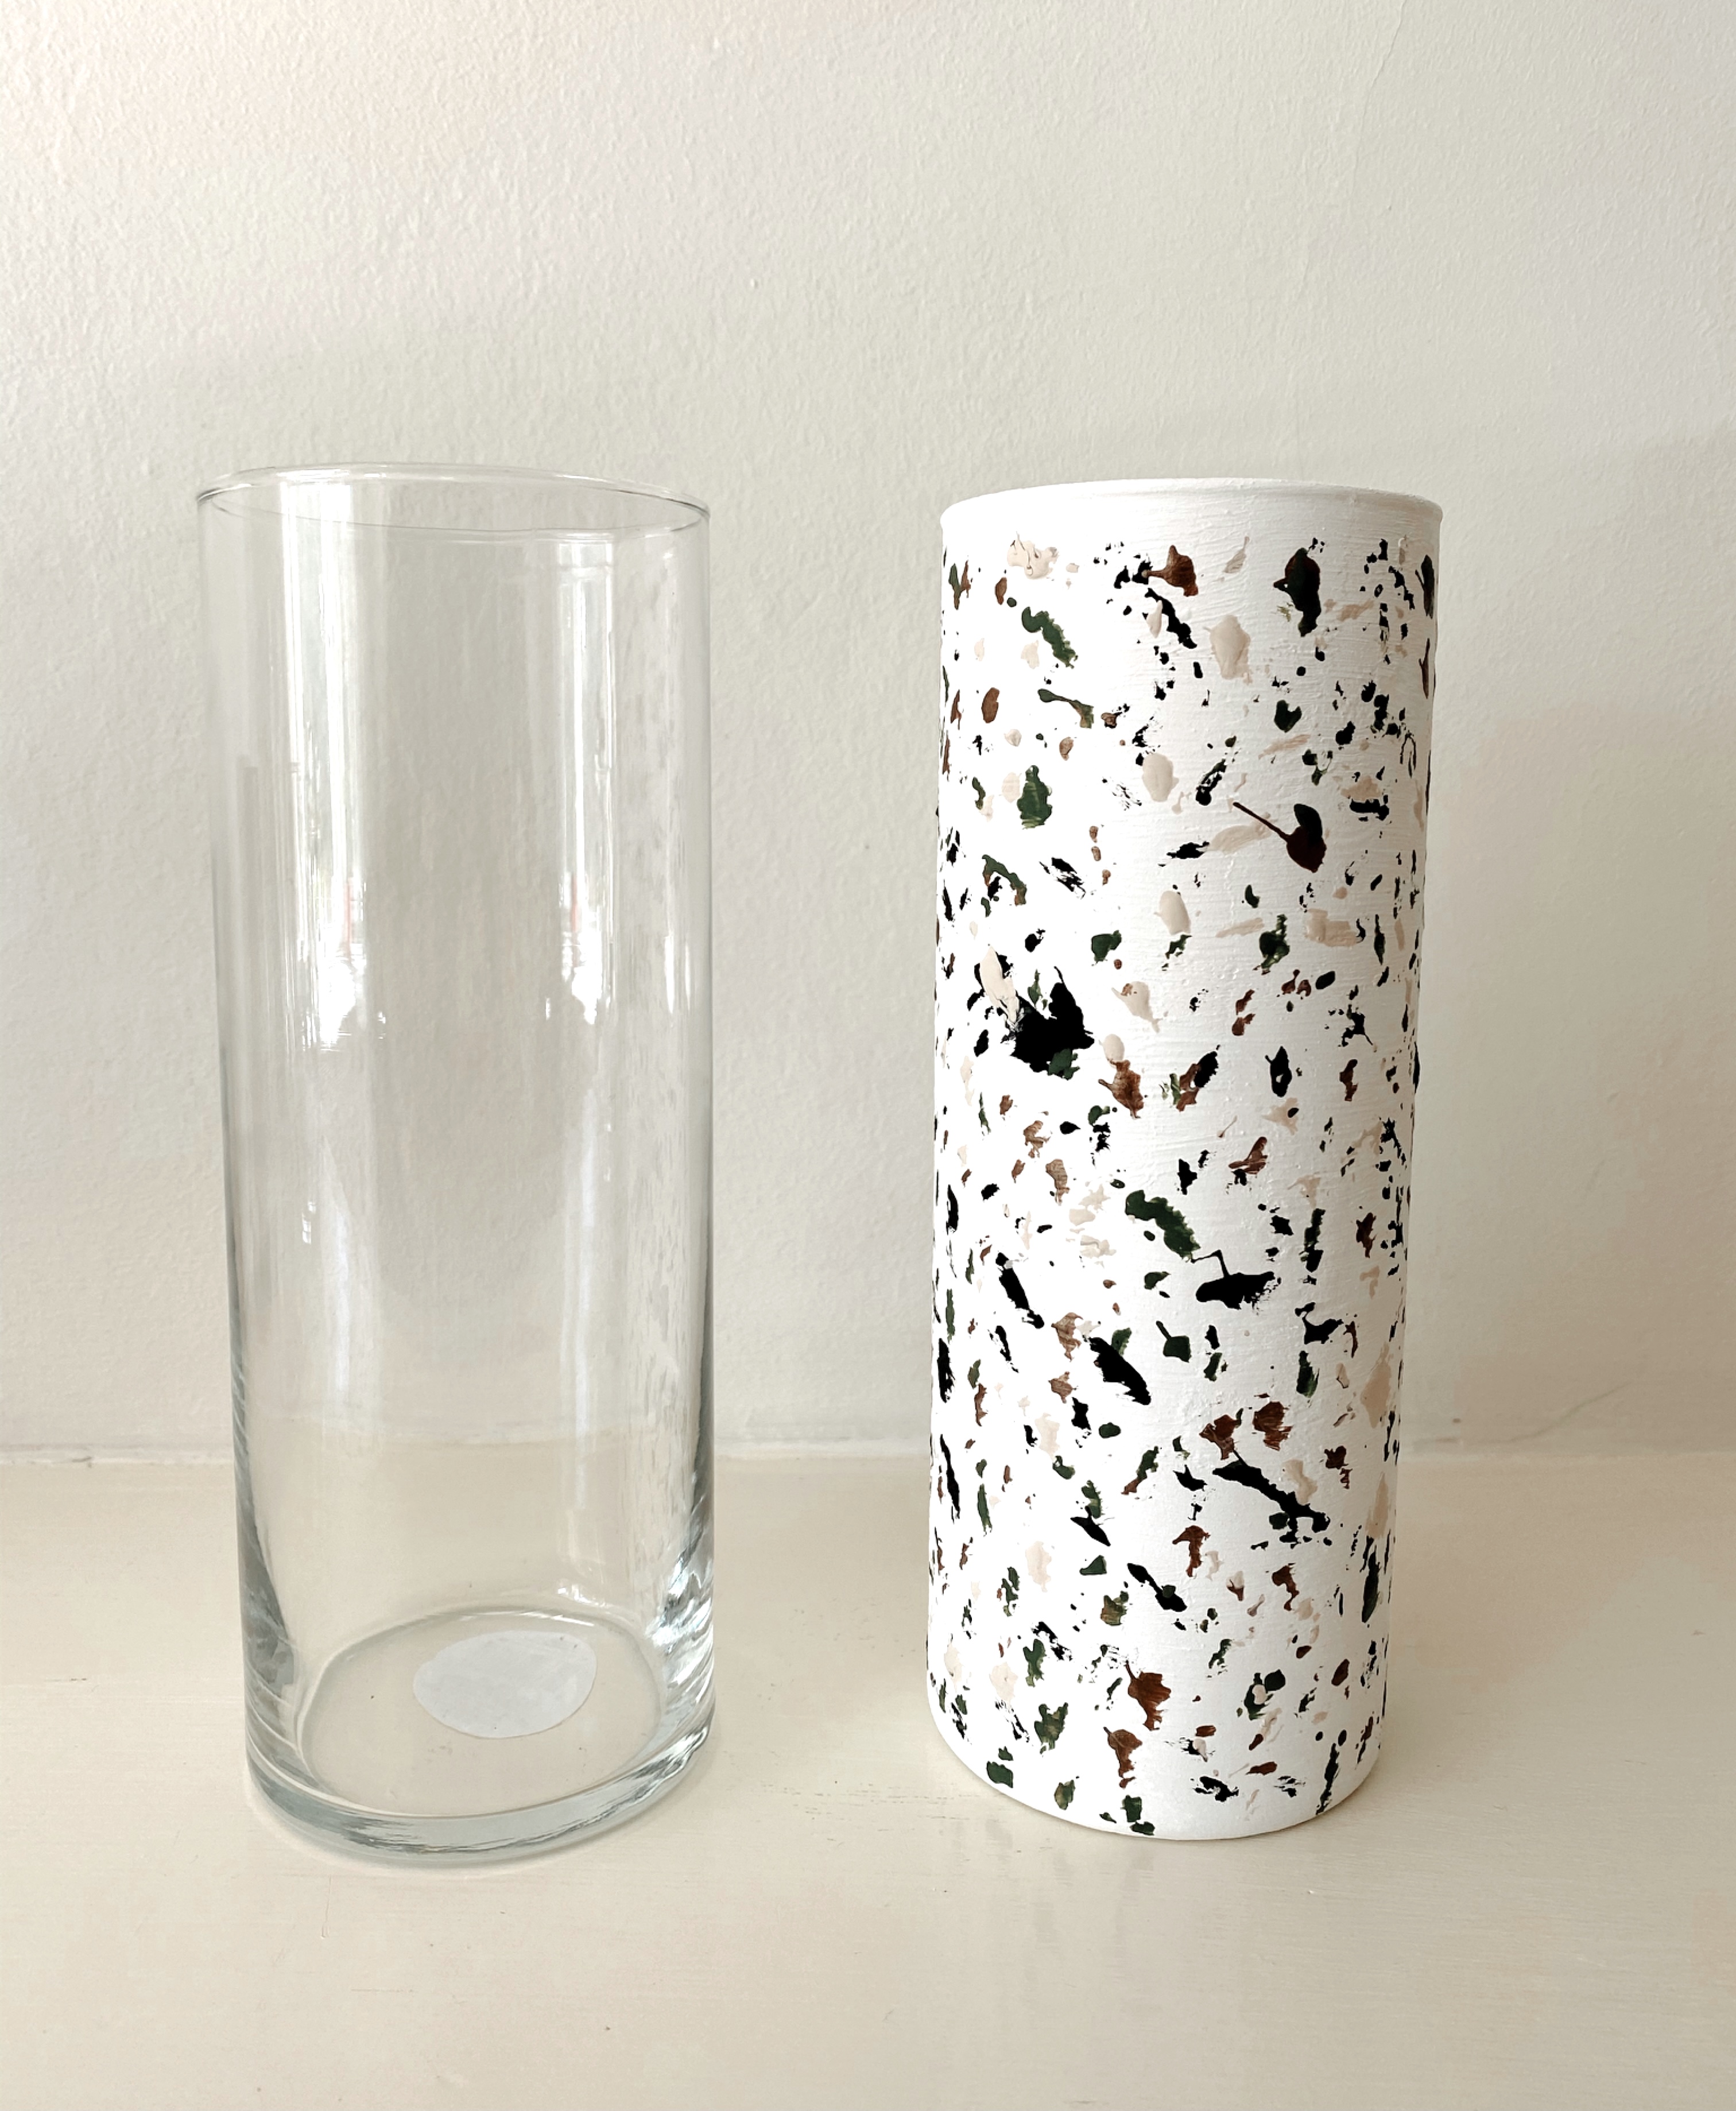
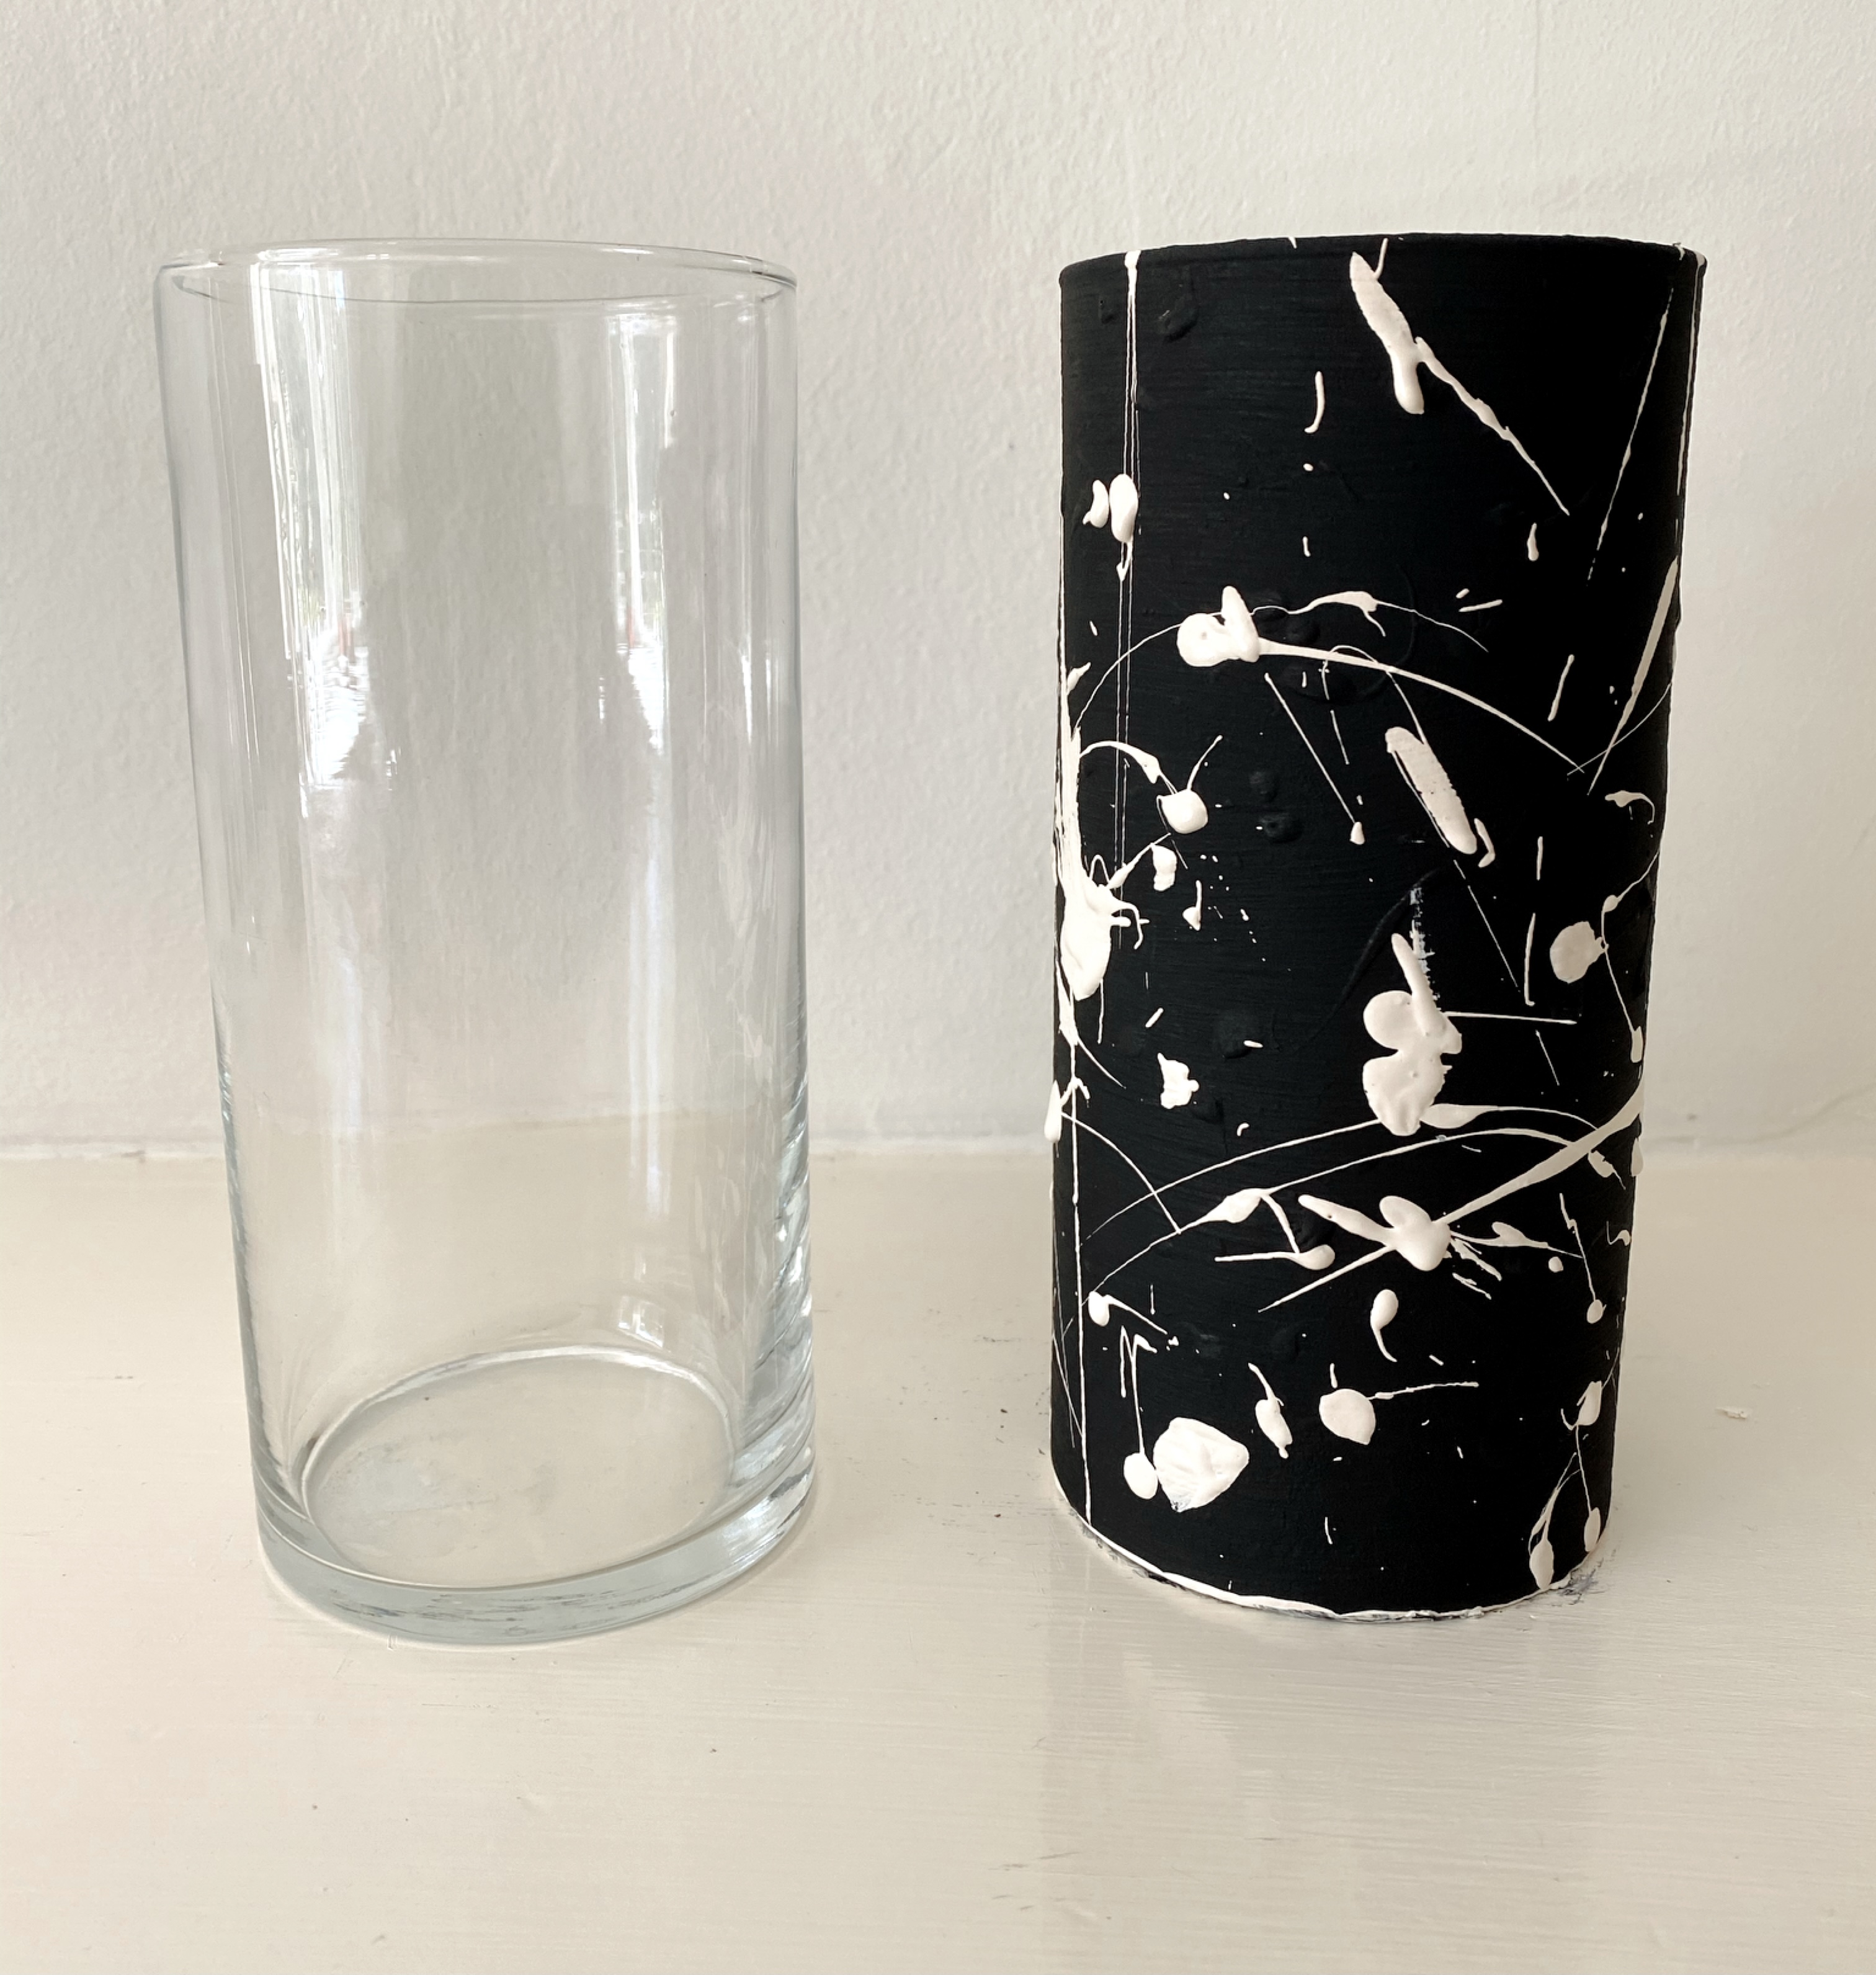
Speckled
This one was my favorite! All you do is choose which color (or colors) you want to decorate your vase with. Now place a little bit of paint from each color you want into separate bowls, take a toothbrush, and dip the bristles into the paint. Next, free ball it! Start pressing the toothbrush all over the vase, in random patterns, placement, and sizes. Some heavy presses, some light. Some just the tip of the toothbrush, some the whole thing. Now repeat for each color until the majority of the space is filled in. See below!

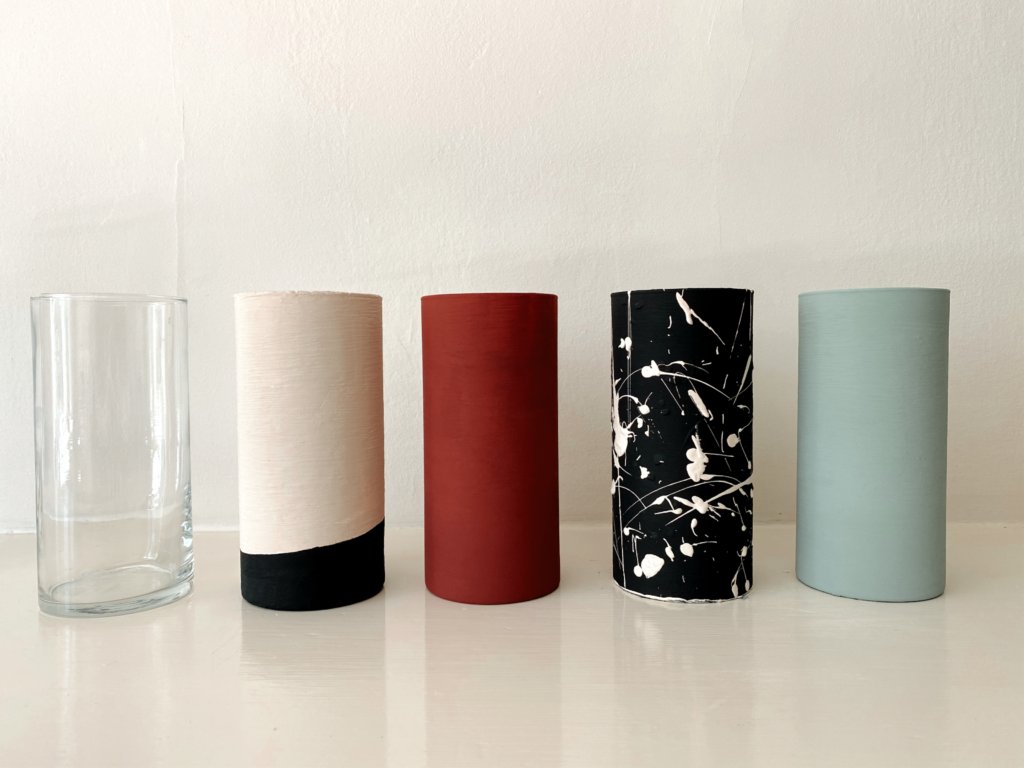
Linear
This is where the paint tape comes in. Again, this is completely up to you. You can do a straight line and cut the vase in half to do half one color, half another. Or make some variation of a plaid or geometric pattern with the tape. You can use it to make straight lines up and down. OR or you can use it for a slanted linear design, like I did here!
Splatter
Annnnnnnd this is where the tarp comes in. Place your vase upright. Choose which colors you want to use, dip the end of a toothbrush or a small paint brush into the paint, and now whip your hand back and forth to create a splatter effect, like I did here!
Again, all of these designs are personal and really what you make them. Don’t be afraid to mess up! Once I let go of the thought “But what if it doesn’t come out good?”, is when I painted my favorite vases. Remember, this is why we are using $1 vases. YOU GOT THIS!
How Do I Clean Up?
THIS WAS THE HARDEST PART FOR ME. Sorry I don’t know why the caps were necessary but for some reason I had a hard time finding one single method of cleaning up paint/paint water that didn’t involve extra supplies or a lot of time. Needless to say, I searched far and wide and this is the best method I could find.
You’ll need a storage bin with a lid, a big bucket, and cat litter. Links below.
- Storage bin with lid – this is the best!!!!
- Big plastic bucket – I got this IN STORE because the minimum quantity to order it online is 36 LOL. So unless you’re in the market for 36 plastic bins I recommend going in person and getting one for….$1.
- Cat litter – it doesn’t matter if it’s clumping or non-clumping
Stay with me.
- Fill the storage bin about 1/4 with cat litter.
- After you’re done painting, wash the brushes in 2 parts soap, 1 part water, and make sure to run your fingers through the bristles to get all the paint out.
- Let the brushes soak in the water and soap for a few hours.
- Wash the brushes off completely with water and make sure there is no remaining paint. Set on a towel or paper towel to dry.
- Pour the paint water into the bin with the cat litter. Shake it up for a few seconds. You can now put this in a plastic bag and throw this out directly into the trash! I referenced this video in case you are more of a visual person.
OK FRIENDS! That’s the that on that with $1 vases and how to turn them into stunning pieces. If you compare these to $100+ ones from other places, I’d say it’s well worth it. If you also prefer bigger vases or different shaped vases, you can easily buy other glass vases at places like Target or Amazon and still follow this process to paint them. It’s really all up to you!
Do you have any tips or tricks for me? Are you going to try this at home? I promise if I can do it, so can you! BTW, if anyone has found cheap fake branches and pampas please let me know. All of the ones online are so expensive and I just decorated 20 vases so gonna need a whole lot of stuff to put inside of them.
If you wanna keep the DIY/creative juices flowing, check out How To Create A Beautiful and Personal Photo Gallery Wall.
I hope you enjoyed this! Until next post 🙂